
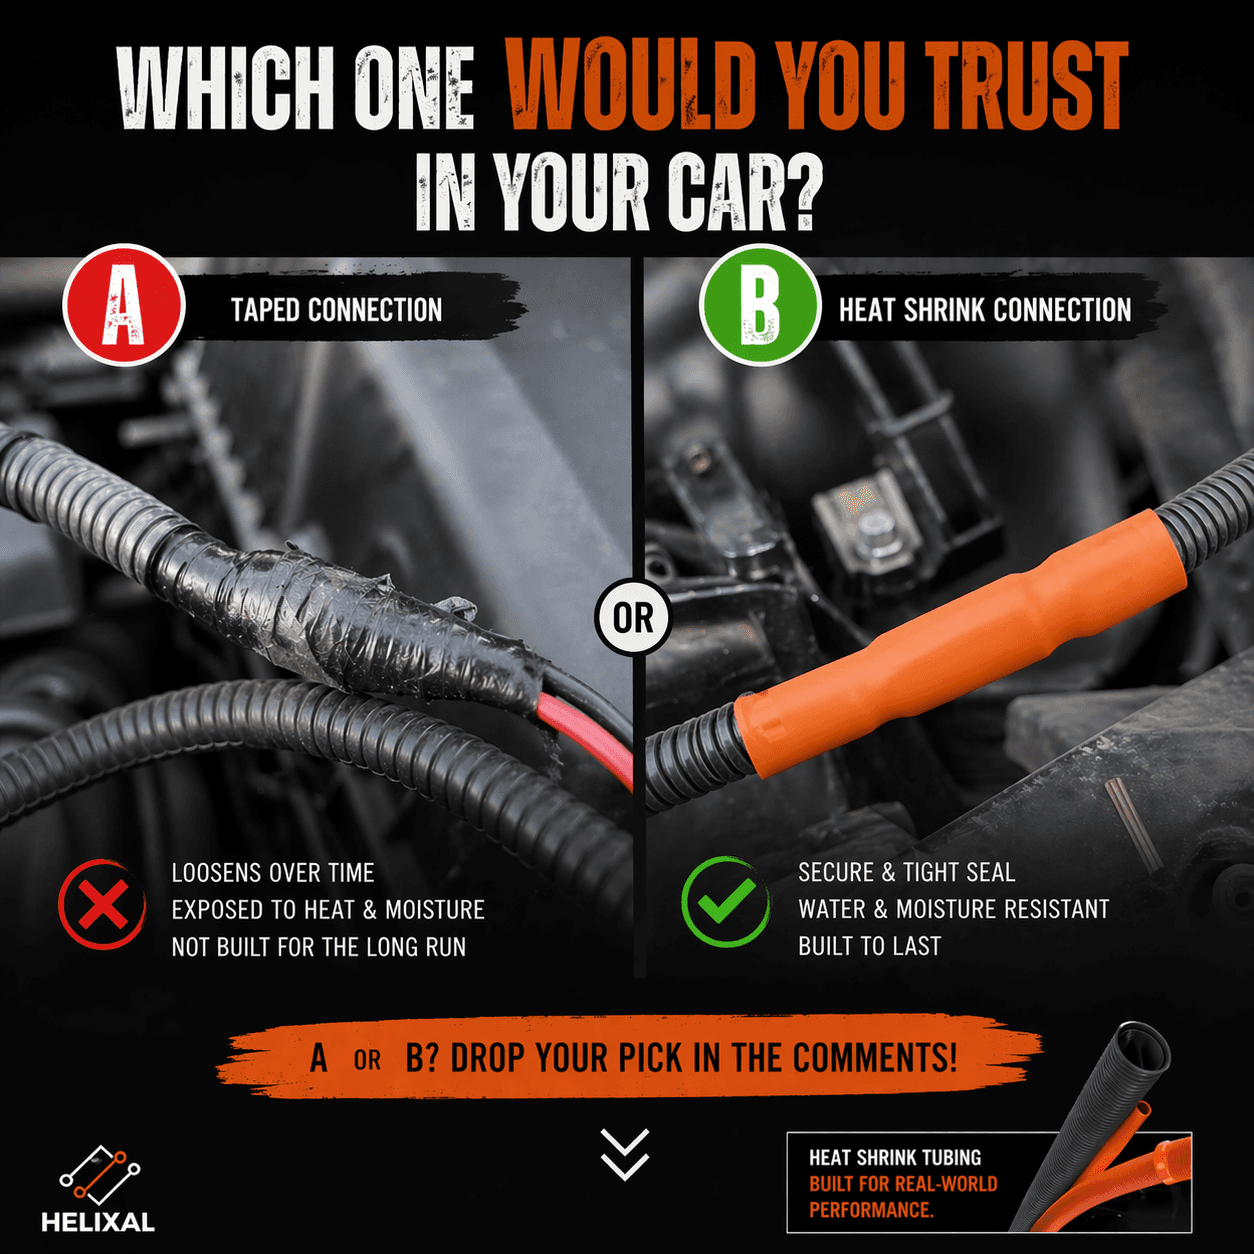
Automotive wiring faces extreme conditions — heat from the engine bay, constant vibration, moisture, and chemical exposure. Heat shrink tubing is the professional standard for protecting electrical connections in vehicles, offering durability and reliability that electrical tape simply cannot match.
Whether you are working on a classic car restoration, a custom build, a trailer wiring repair, or adding aftermarket electronics, this guide gives you the complete picture: why automotive wiring demands premium materials, how to select the right product for each location, and the step-by-step process professionals use.
Why Car Wiring Needs Proper Protection
Engine Bay Temperatures
Ambient air temperature in a standard engine bay typically reaches 100–120°C at operating temperature. In turbocharged or high-performance vehicles, this can exceed 150°C. Near exhaust manifolds and turbochargers, local temperatures are even higher. Electrical tape's PVC softens above 60°C — at engine bay temperatures, it simply falls off the wire. Polyolefin heat shrink tubing is rated for –55°C to +125°C continuous operation and handles this range without degradation.
Vibration and Mechanical Stress
Engines produce continuous vibration across a wide frequency range, transmitted through the body and chassis to every wire in the vehicle. Over time, this vibration causes tape to loosen at the edges and begin unraveling — first slowly, then rapidly as the adhesive weakens. Heat shrink tubing's mechanical bond to the wire insulation is not affected by vibration. It stays in place for the life of the vehicle.
Moisture and Road Salt
Underbody wiring, wheel well sensors, trailer connectors, and door harnesses are regularly exposed to road spray, rain, and in northern climates, heavy salt. Salt is an electrolyte that dramatically accelerates corrosion of electrical connections. A single gap in tape wrapping — even a microscopic one — provides a path for salt water to reach the conductor. Dual wall heat shrink's adhesive inner layer creates a sealed barrier that blocks this path entirely.
Chemical Exposure
Engine oil, coolant, brake fluid, transmission fluid, and fuel all make their way onto wiring in a busy engine bay. PVC electrical tape absorbs these chemicals over time, causing the material to swell, harden, and crack. Polyolefin heat shrink tubing resists all common automotive chemicals — oil, fuel, solvents, and coolant — without degradation.
Heat Shrink vs Electrical Tape in Automotive Applications
| Property | Dual Wall Heat Shrink | Electrical Tape |
|---|---|---|
| Max temperature rating | ✓ –55°C to +125°C | –10°C to +80°C |
| Vibration resistance | ✓ Bonded mechanically — unaffected | Loosens and unravels over time |
| Moisture seal | ✓ Complete — adhesive fills gaps | None — water enters at edges and overlaps |
| Chemical resistance | ✓ Oil, fuel, solvents, coolant | Absorbs oil and solvents — swells and cracks |
| Service life in engine bay | ✓ 10–20+ years | 1–3 years before failure |
| Professional shop preference | ✓ Standard for all permanent work | Temporary or emergency only |
Choosing Heat Shrink for Your Car Project
Not all locations in a vehicle have the same demands. Use this guide to choose the right product for each area:
Engine Bay Wiring
3:1 Dual Wall Adhesive-LinedHigh temperature, chemical exposure, and moisture ingress risk demand the full protection of dual wall with adhesive seal. No exceptions.
Underbody and Chassis Wiring
3:1 Dual Wall Adhesive-LinedRoad salt, water spray, and UV exposure make dual wall essential for any connection not inside a sealed harness. This includes trailer connectors, wheel speed sensors, and underbody lighting.
Interior Cabin Harness Repair
2:1 Standard OR 3:1 Dual WallInterior wiring in a dry cabin can use 2:1 standard for simple repairs. However, dual wall is still preferred — the extra cost is minimal and the seal gives you peace of mind against any future moisture intrusion (water leaks, spills, windshield seal failure).
Outdoor Sensor Wiring
3:1 Dual Wall Adhesive-LinedO2 sensors, temperature sensors, and pressure sensors mounted outside the cabin see full environmental exposure. Always use dual wall here.
Top 5 Automotive Uses for Heat Shrink Tubing
Battery Terminal Protection
Battery terminals are one of the most corrosion-prone areas on a vehicle. Even a slight amount of moisture or battery acid mist will cause rapid oxidation on unprotected terminals. After crimping or soldering ring terminals to battery cables, cover each crimp joint with dual wall heat shrink tubing that extends 1 inch onto the cable insulation. This single step eliminates terminal corrosion and is standard practice in professional auto shops.
Oxygen Sensor Wiring
O2 sensor wiring exits the exhaust and runs through the engine bay — one of the harshest possible environments. OEM harnesses use high-temperature sleeving and heat shrink at connection points. When replacing sensors or splicing damaged wiring, dual wall heat shrink at every connection is essential. The connection sits adjacent to the exhaust manifold where temperatures can exceed 150°C.
Trailer Wiring Connectors
Trailer wiring is chronically neglected. The connections live under the rear bumper, exposed to road spray, mud, and salt year-round. Bare or tape-wrapped splices corrode within one or two seasons. At minimum, use dual wall heat shrink on every splice. For the main connector plug, silicone grease in the socket plus a weather cover are also recommended.
Speaker Wire Connections
In-vehicle audio installations that run speaker wire through doors and under panels benefit from heat shrink protection at every connection point. It keeps the connection clean, prevents shorts if wire routing shifts over time, and provides a professional finish. For door speaker connections, dual wall gives the added benefit of resisting the moisture that often enters door cavities.
Custom Wire Harnesses
Any custom wiring project — additional lighting, audio systems, auxiliary gauges, or performance modifications — should use heat shrink tubing for all connections. Using the correct size and color-coding your harness with different colored heat shrink makes future diagnosis significantly easier. Dual wall at high-stress points, standard 2:1 for interior runs.
Butt Splice Connectors
Butt connectors are the standard method for mid-wire splices in automotive repair. For any splice exposed to moisture, road salt, or engine bay conditions, cover the crimp barrel with 3:1 adhesive lined heat shrink tubing — this is what professionals call a heat shrink butt connector. The dual wall tubing encapsulates the crimp and creates a waterproof butt splice that resists corrosion for the life of the vehicle.
Step-by-Step: Protecting Automotive Wiring
Plan Before You Connect
Before making any connection, slide the appropriate size heat shrink tubing onto the wire. This is the most critical planning step — there is no way to add heat shrink to a finished connection without cutting it apart. Cut the tubing long enough to extend 1–2 inches beyond the connection on each side.
Strip and Connect Cleanly
Use the correct size wire stripper for your gauge. Strip approximately 3/4". Do not nick the conductor strands. Twist the strands tightly before inserting into a crimp connector. Use a ratcheting crimper for consistent, full-compression crimps — a half-crimped connector is a future failure point that heat shrink alone cannot fix.
Center and Check the Fit
Slide the heat shrink tubing over the connection and verify it extends at least 1 inch beyond the crimp or joint on both sides. For engine bay or underbody work, err on the side of more coverage — 1.5 to 2 inches of overlap on each side provides better protection.
Apply Heat Evenly
In tight engine bay spaces, a compact heat gun is essential — a standard full-size heat gun can be difficult to maneuver. Apply heat from the center of the sleeve outward to each end. Rotate the connection or the heat gun to ensure uniform heating around the circumference. Watch for the adhesive to appear at the ends.
Allow to Cool and Route Properly
Allow the connection to cool before routing and securing. When routing in the engine bay, keep wiring away from moving parts (belts, fans, linkages), hot surfaces (exhaust, turbocharger), and sharp edges. Use factory-style plastic clips to secure the harness — loose wiring that moves against surfaces will eventually chafe through even good-quality insulation.
Size Chart for Automotive Applications
Use this chart as a starting point. When the connection includes a terminal or connector, size for the connector's outer diameter, not the wire alone.
| Wire Gauge | Typical Application | Recommended Dual Wall Size |
|---|---|---|
| 22–20 AWG | Sensor wiring, small electronics | 3/32" (2.4mm) |
| 18 AWG | O2 sensor, ignition signal, audio | 1/8" (3.2mm) |
| 16–14 AWG | Lighting, accessories, fans | 3/16" or 1/4" |
| 12 AWG | Fused circuits, heavy accessories | 1/4" (6.4mm) |
| 10 AWG | High-current accessories, alternator aux | 3/8" (9.5mm) |
| 8 AWG | Starter solenoid, main feed circuits | 1/2" (12.7mm) |
| 6 AWG | Battery ground, alternator output | 3/4" (19.1mm) |
| 4 AWG | Battery cable, heavy ground | 3/4" to 1" |
| 2/0 AWG | Main battery cable, high-current bus | 1" to 1-1/4" |
Need help selecting the right size for a specific application? Message us on WhatsApp →
SHOP HELIXAL AUTOMOTIVE HEAT SHRINK
3:1 dual wall for engine bay and underbody, 2:1 standard for interior runs — 13 sizes each. Rated –55°C to +125°C. Ships fast across the USA.
TRADE & WHOLESALE
Buying in bulk for your shop?
Helixal supplies heat shrink tubing in bulk to auto shops, electricians, and distributors. All 13 sizes across 3 product lines, with competitive volume pricing.
View Wholesale Options →Frequently Asked Questions
What heat shrink should I use for automotive wiring?
For engine bay and underbody automotive wiring, use dual wall adhesive-lined heat shrink with a 3:1 shrink ratio. It withstands temperature cycling (rated –55°C to +125°C), resists vibration, seals out moisture and road salt, and bonds mechanically to the wiring. For interior cabin wiring or low-stress repairs, 2:1 standard heat shrink is adequate.
Can heat shrink handle engine bay temperatures?
Yes — quality polyolefin heat shrink tubing is rated for –55°C to +125°C continuous. Engine bay ambient temperatures typically reach 100–150°C in performance vehicles. For connections within 6 inches of exhaust components, add thermal sleeving. Helixal 3:1 Dual Wall tubing handles standard engine bay conditions without degradation.
Is dual wall heat shrink necessary for automotive use?
For connections exposed to moisture, road salt, engine chemicals, or temperature cycling, dual wall adhesive-lined heat shrink is strongly recommended. Single-wall provides insulation but no waterproof seal — moisture wicks along wire strands and corrodes the connection. In wet or salty conditions, dual wall is the professional standard.
How do I protect automotive wiring from heat?
Use dual wall adhesive-lined polyolefin heat shrink rated for –55°C to +125°C. For connections near exhaust, add reflective thermal sleeving as an outer shield. Route wiring away from hot surfaces using factory-style clips. For direct exhaust heat exposure, combine high-temperature silicone sleeving (rated 200°C+) with heat shrink at termination points.
What size heat shrink do I need for my car?
For most automotive wiring: 3/32" to 3/16" for sensor wires (18–22 AWG), 1/4" to 3/8" for chassis wiring (12–16 AWG), and 1/2" to 3/4" for power circuits (6–10 AWG). For battery cable connections, use 3/4" to 1-1/4" dual wall. Always size to slide over the connector or terminal before shrinking.
What heat shrink do I use for automotive butt connectors?
For automotive butt splice connectors, use 3:1 dual wall adhesive lined heat shrink tubing sized to slide over the crimp barrel — typically 3/16" to 3/8" depending on wire gauge. The adhesive inner layer seals the splice against moisture and road salt, creating a waterproof butt splice that lasts the life of the vehicle.
Related Articles
Trailer Lights Not Working? 7 Causes and How to Fix Them
Test the socket, find the bad ground or corroded splice, and seal the repair.
How to Clean Battery Terminal Corrosion — and Stop It Coming Back
Professional corrosion protection for battery terminals using dual wall heat shrink tubing.
Heat Shrink Butt Connectors: Waterproof Crimp Splice Guide
How to create professional waterproof butt splices for automotive and marine wiring.
Solder and Heat Shrink: Complete Professional Wire Connection Guide
When to solder vs crimp, and how to finish every connection with heat shrink for a permanent seal.
Heat Shrink Tubing vs Electrical Tape: The Definitive Comparison
Why professionals choose heat shrink over electrical tape for permanent wire protection.
Copper Wire Prices 2026: Tariffs & How to Protect Your Wiring Budget
Why replacement wire costs more this year — and why protecting existing harnesses pays off.
Heat Shrink Size Calculator — Free Tool
Enter your wire gauge or diameter and get the exact heat shrink size for 2:1, 3:1, or 4:1.
Professional Automotive Protection
Shop Helixal Heat Shrink Direct
3:1 dual wall adhesive-lined and 2:1 standard heat shrink tubing in 13 sizes. Rated –55°C to +125°C. Chemical resistant. Ships fast across the USA — secure direct checkout.